
Building a proper enclosure for your laser engraver is not only practical but also enhances the safety and functionality of your workspace. Here’s a simple guide based on my personal experience constructing an enclosure for my laser engraver.
The Enclosure Design
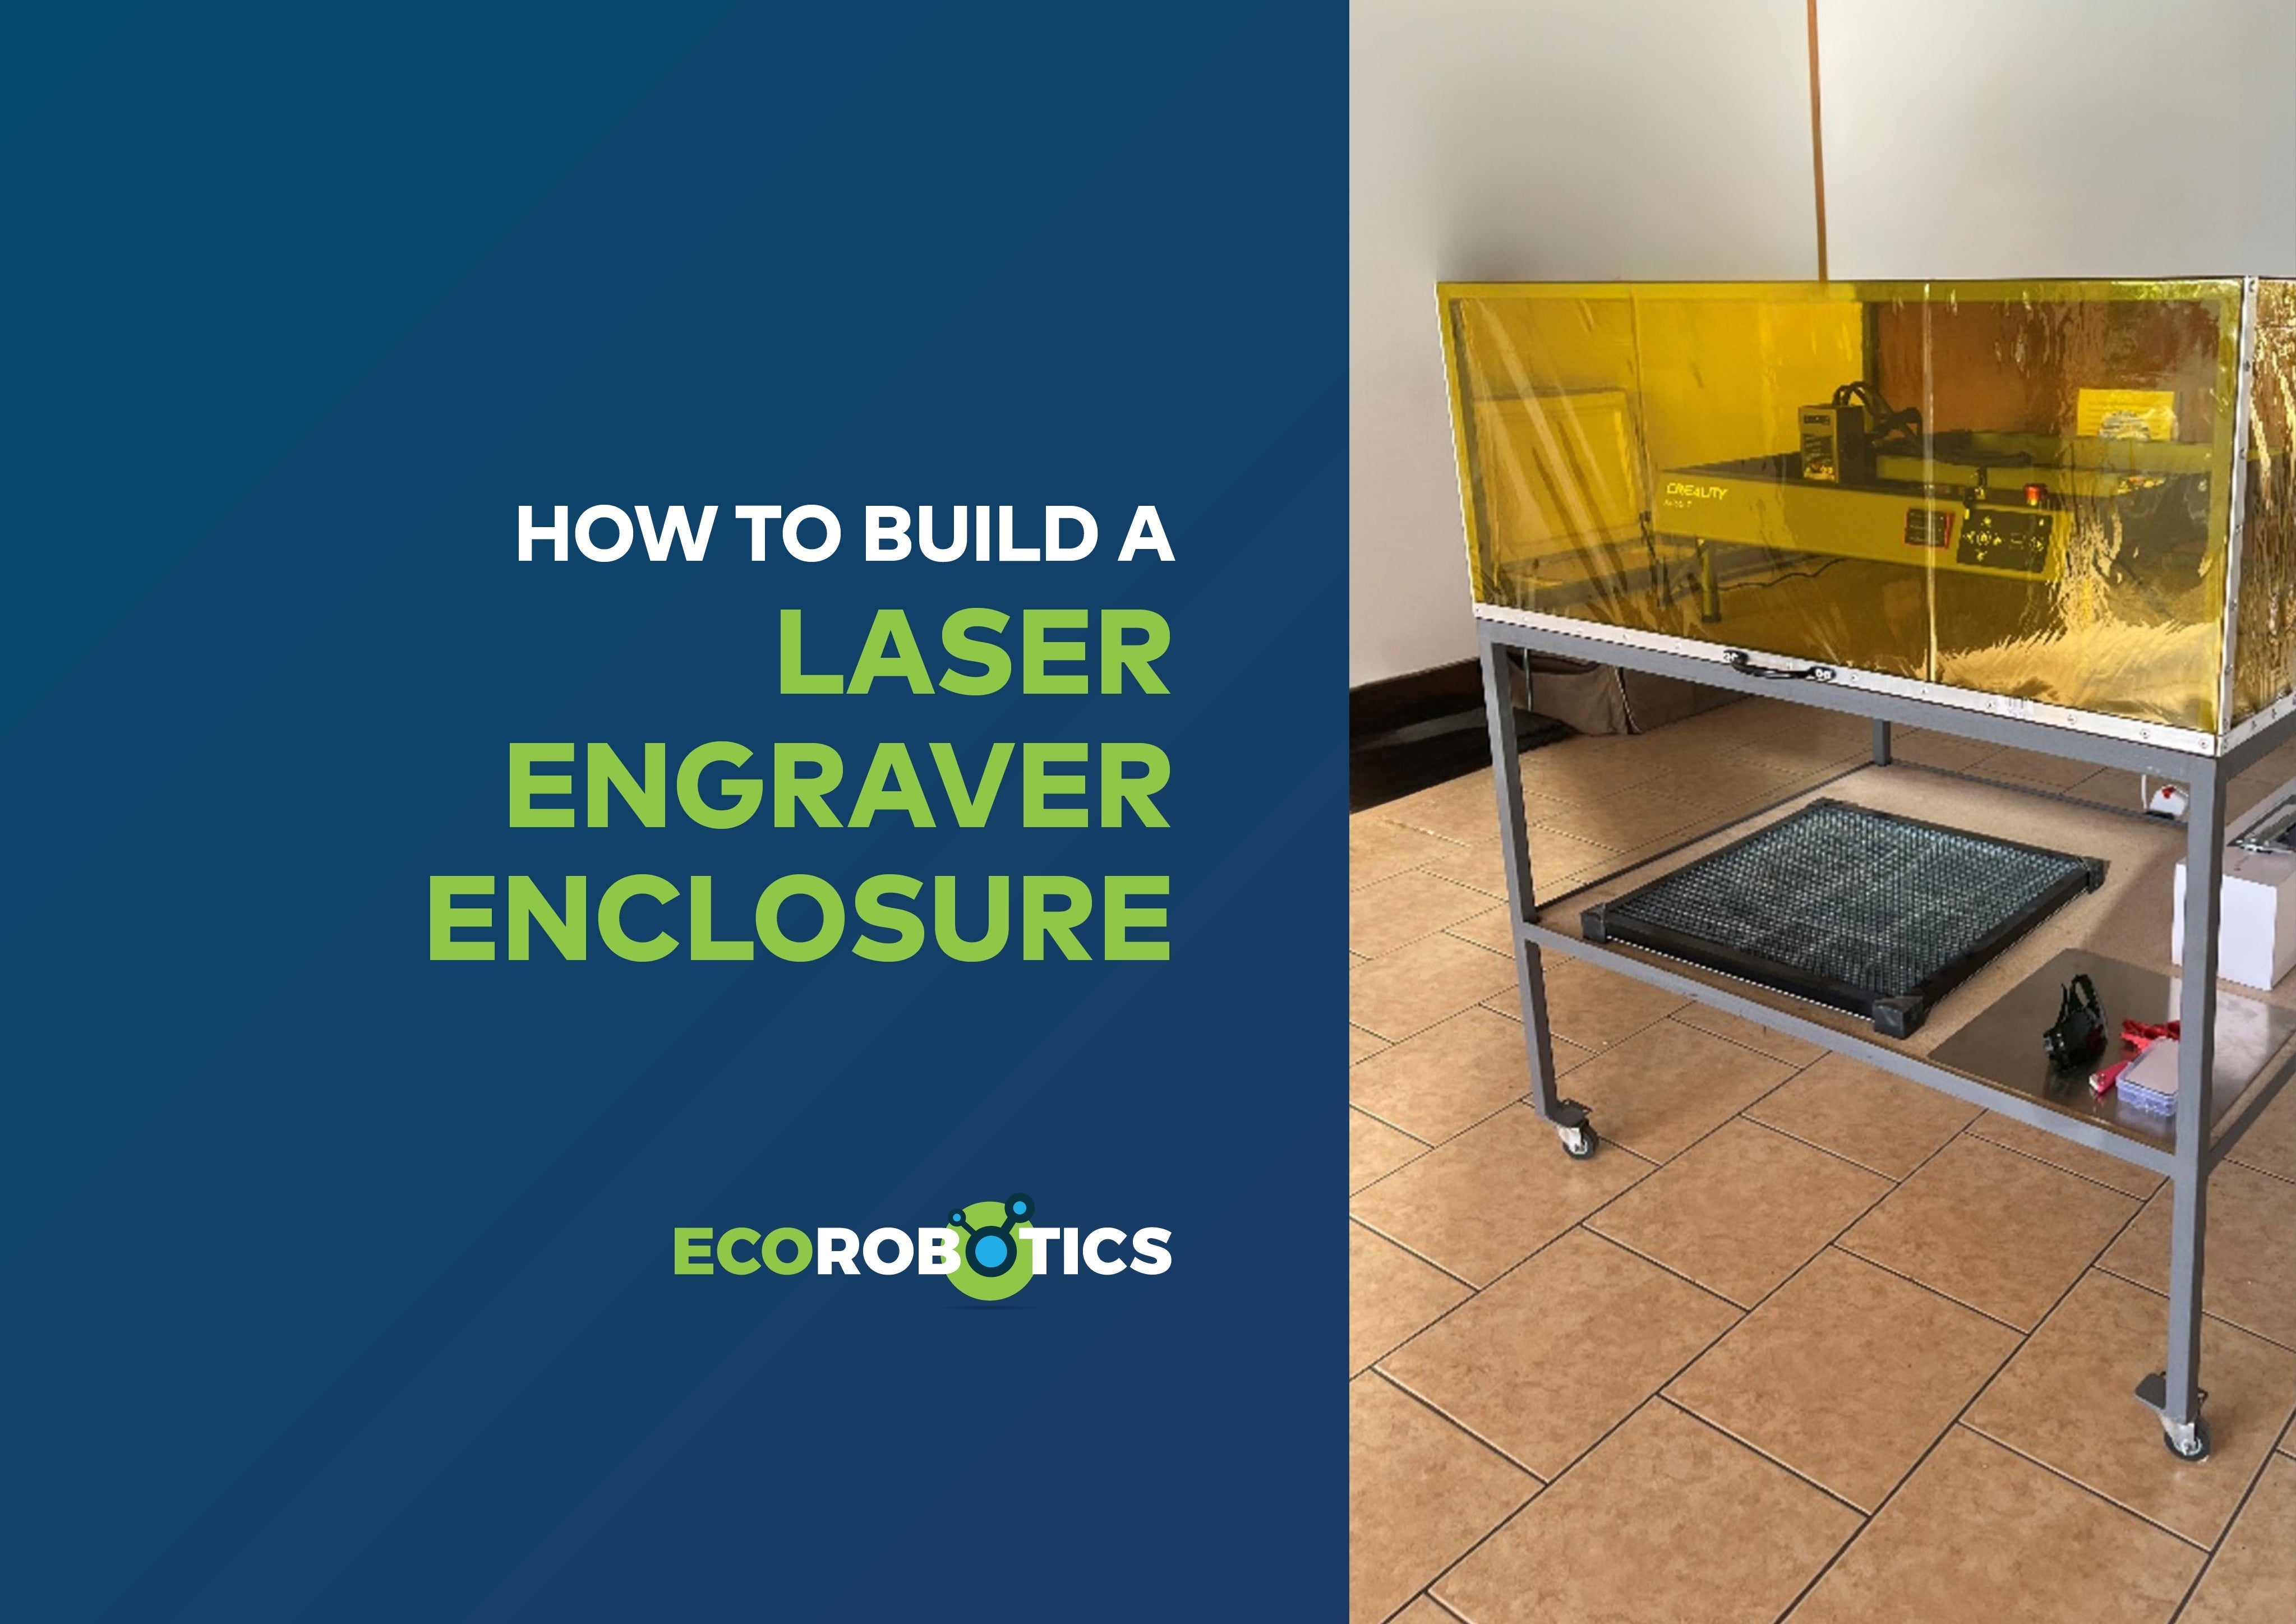
The enclosure I built has dimensions of 1000x800x400mm, wrapped with a welding screen for safety and visibility. The design allows for easy access, opening like a "spit braai," with a chain to hold the lid securely open.


At the back, I added a wooden sheet with precisely cut holes for the following:
• Extractor fan
• Air assist tubing
• Power cable

Added Functionality
Storage Shelf
To enhance usability, I installed a shelf 400mm below the main working area. This shelf is perfect for storing wood sheets, tools, and other supplies.
Mobility
The total height of the enclosure is 1200mm (excluding the wheels). I added wheels to make it easy to move the enclosure around the workshop.
Extractor Fan
I installed an extractor fan connected to a pipe that vents smoke out of a nearby window. This ensures a cleaner and safer working environment.
3D-Printed Accessories
To further improve the setup, I incorporated several 3D-printed mounts and holders:
- Under-the-table air assist mount: Keeps the air assist neatly out of the way. Find it here.
- Power brick mount: A sturdy holder for the power brick. Check it out.
- Focus tool holder: Conveniently stores your focus tool. Grab the design here.
- Honeycomb alignment feet: Ensures precise placement of the honeycomb bed. Explore the design.


Key Benefits
- Improved Safety: The welding screen and extractor fan enhance protection and air quality.
- Enhanced Organization: The storage shelf and 3D-printed holders keep tools and components neatly arranged.
- Convenience: The enclosure is mobile, allowing for easy repositioning, and the well-designed mounts ensure a clutter-free workspace.
Creating a custom laser engraver enclosure like this one not only protects your equipment but also makes your workspace more efficient and enjoyable. With some basic materials, a bit of 3D printing, and a touch of creativity, you can build an enclosure tailored to your needs. Happy making!
If building an enclosure isn’t for you, no worries! You can opt for the ready-made CREALITY Laser Engraver Enclosure Pro—designed for convenience, safety, and performance.